SNAP-Shot!Tm 3
Making Screen Snapshots
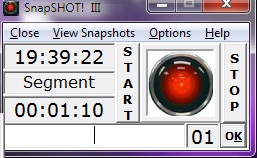
The SNAP-Shot! main screen has been made as small as possible without sacrificing functionality. When the software is started, the screen appears at the top-left of the computer desktop. You can position the snapshot screen to anywhere on the desktop by left-clicking on the title bar and holding down the mouse button while you use the mouse/trackball to position the snapshot screen to the desired location.
When SNAP-Shot! is started, the Snapshot Viewer Screen is also launched, but remains invisible, until you click on the View Snapshots menu item. The time of day is always maintained at the top of the snapshot screen. This helps document the time of day each screen image is taken.
The segment time is maintained below the time of day. It starts "ticking" as soon as the screen is displayed. Segment timing allows you to group pictures as logical (i.e. related) entities. You can reset the segment time by clicking the Start button. The segment time can also be "frozen" by clicking the Stop button.
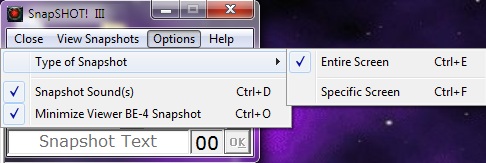
The Options menu allows you to select the KIND of screen you wish to snapshot from the following choices:
- The Entire screen (Ctrl-E) - the default.
- A specific window (Ctrl-F).
If you select Ctrl-F and that particular window is not currently active at the time of the snapshot, SNAP-Shot! quietly snapshots the ENTIRE screen, as if Ctrl-E had been selected.
|
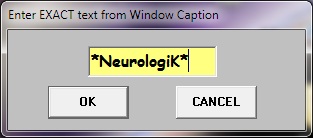
Pressing
Ctrl-F allows you to enter data from the caption bar of an active
window allowing SnapSHOT to capture that screen.
|
Notice
that the Ctrl-F menu entry is then changed to reflect the text you
typed in the Ctrl-F Window.
|
When the camera image is clicked, you will see the camera image "blink" momentarily while a screen picture is made and sent to the Viewer screen, along with the timestamp information. If you have the sound feature enabled (Ctrl-D), you will also hear a camera click sound. Once a picture is taken, the text-entry box (at the bottom of the snapshot screen) is enabled allowing you to annotate the picture while it is fresh in your mind. Clicking the OK button sends the text to that picture on the Viewer Screen. If you do not wish to annotate the picture now, you can add text for the picture on the Viewer Screen later.
For each picture taken, a counter is updated indicating how many unsaved pictures are currently on the viewer screen. When pictures on that screen are saved as a group, they are then erased, and the counter on this screen is set back to 0.
Remember: if you choose to snapshot the entire screen (Ctrl-E), the entire desktop (with all open screens) as well as the Snapshot Screen itself will be included in the picture. A distinct advantage of this is that the timestamp information will always be a part of the image.
By default, if the Viewer Screen is visible when you click the camera image, it will be minimized BEFORE the picture is taken so that it doesn't obscure the screen image you are looking to capture. If needed, you can disable this from the Options menu (or by pressing Ctrl-O).
The
Shift-Click Option
You
can add any image that has previously been captured to the windows
clipboard to the group of pictures on the viewer screen by pressing
the shift-key BEFORE clicking on the camera image. Pressing the shift
key bypasses the screen-capture step and progresses directly to
making a snapshot of the image already on the clipboard.